WPJobster comes prepackaged with Loco Translate plugin, which will enable you to translate all of the strings right from within the admin section.
If you are new to Loco Translate, we highly recommend to read their official Beginner’s Guide to get yourself familiarized with all the options that plugin offers.
The very first thing you need to do is check that the main language defined in Admin Dashboard > Settings > General > Site Language is the same as the one you are attempting to translate via Loco Translate plugin. For example, you can have English UK defined as the main site language, and English US in the Loco Translate, in which case the translation will not work.
Now that we have that out of the way, we can start translating the strings:
- Log in to your WP Admin Dashboard
- Go to Loco Translate > Manage Translations > Jobster theme > New language (select your desired language)
- Choose location: “themes/wpjobster/languages”
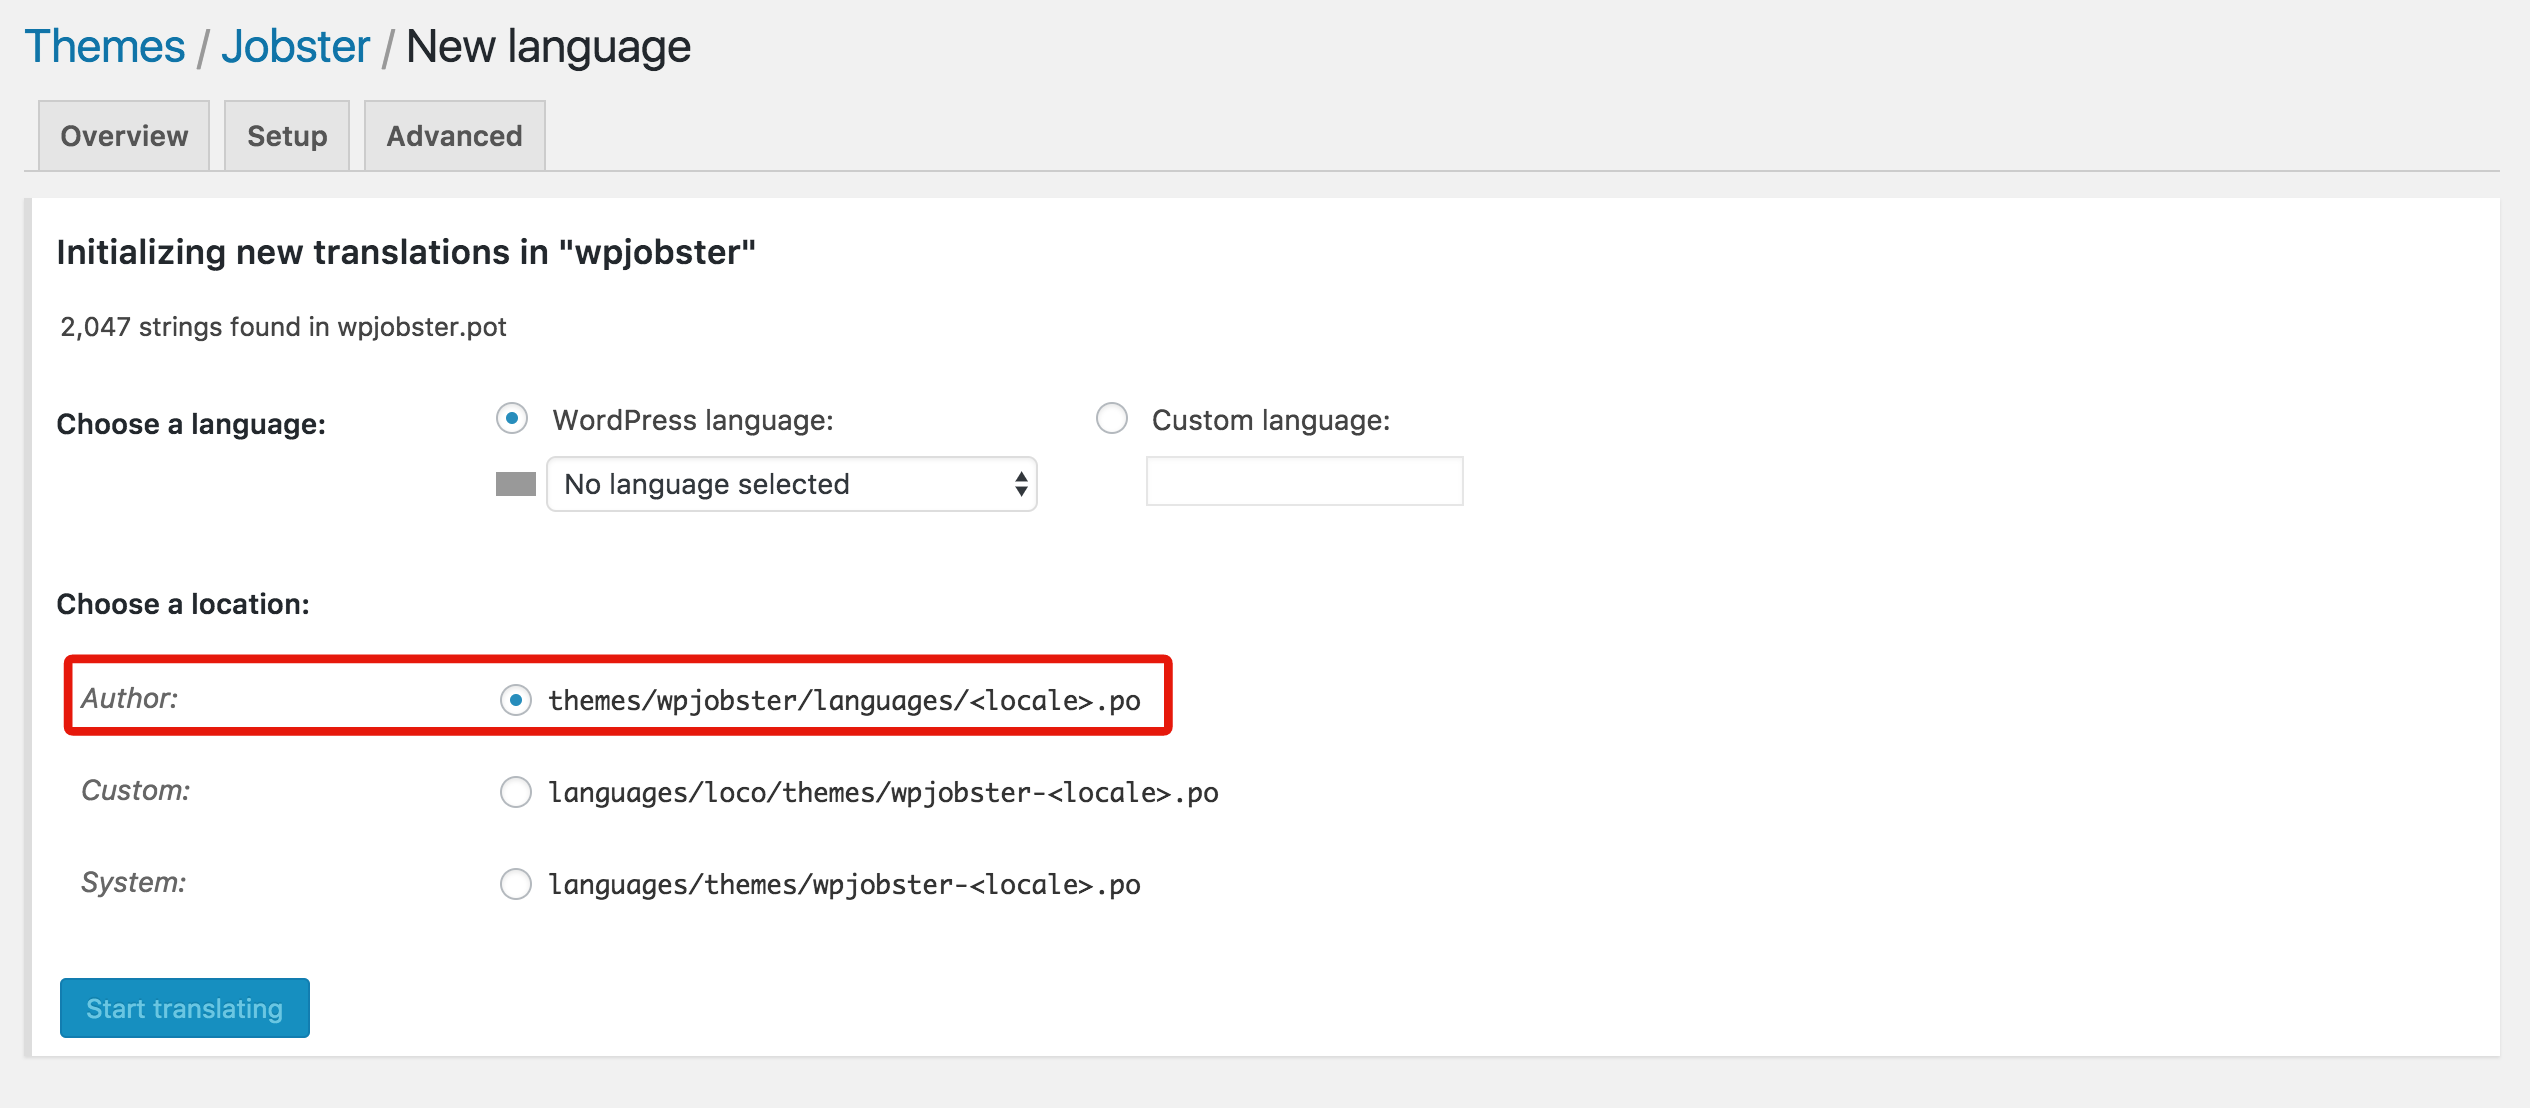
- Click on “Start Translating” button
- Click on “Sync” button so Loco Translate can fetch any new strings that may have been added.
- You can now start translating strings one by one, by entering translations in the translation box
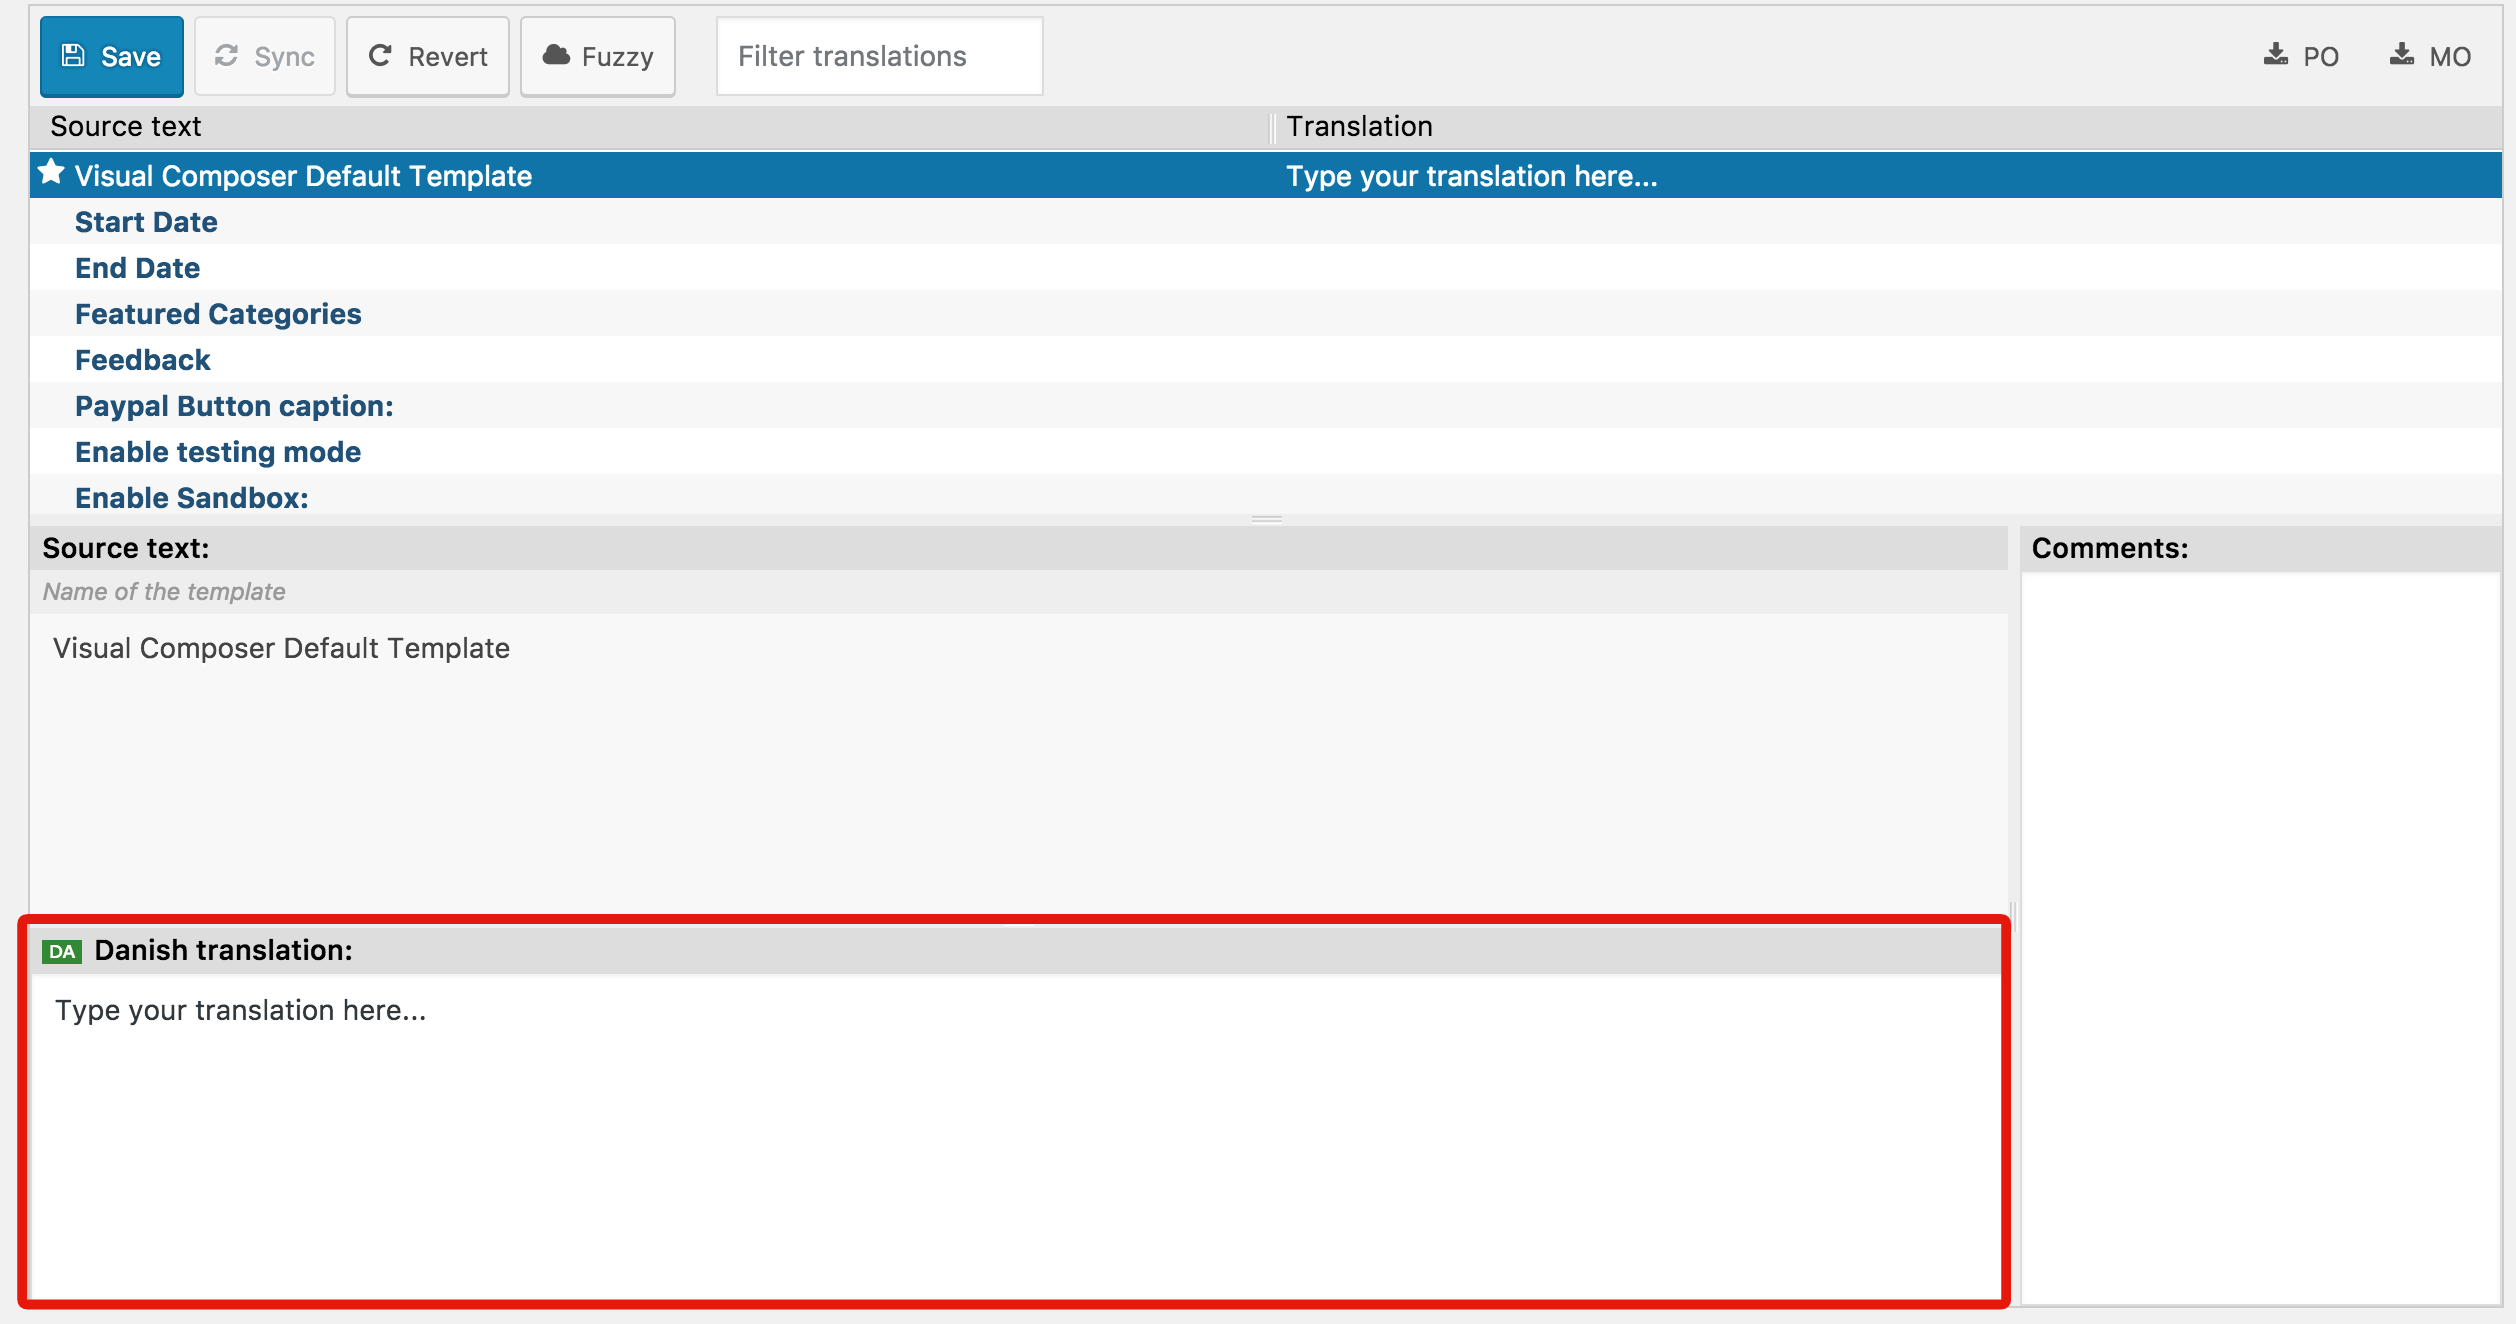
- As a last step, click on “Save” button to publish all of your translations.
Important:
After each theme update you need to click on “Sync” button in order to download any new strings that may have been added, as well as translate those new strings following the same procedure explained above.